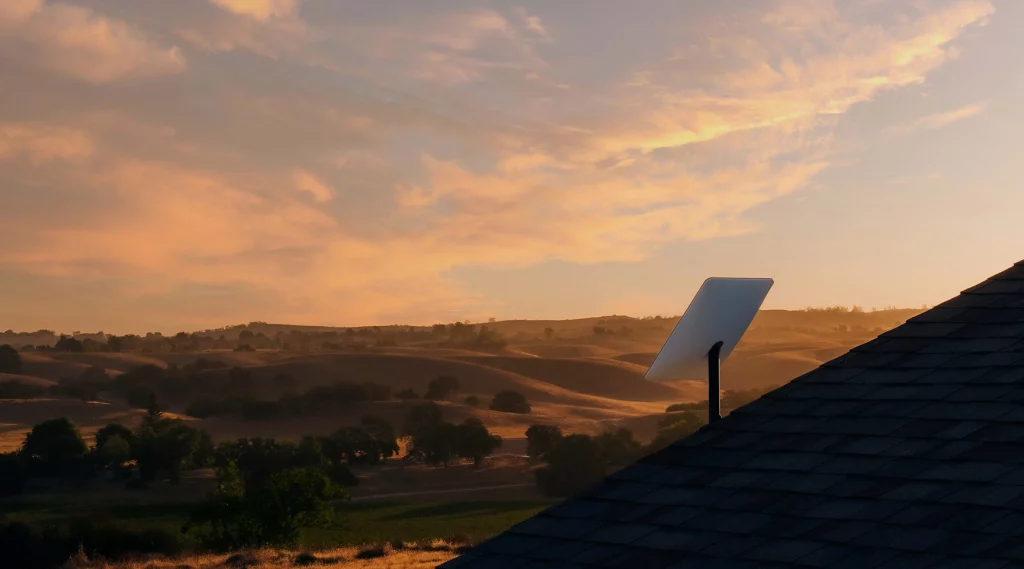
Starlink is a high-speed satellite broadband service from SpaceX. Customers set up their Starlink terminals in clear view of the sky, and these terminals then communicate with satellites in low Earth orbit to deliver a fast, reliable internet connection.
The service has already achieved full Earth coverage. With the second-gen Starlink terminal, Starlink subscribers have a few different mounting options; an example is the Volcano Mount, which is designed to attach terminals to rooftops securely.
Did you get a Starlink but are still unsure how you want to mount it? Or are you curious about the installation options before you invest? Then you should check out the Starlink volcano mount option.
Starlink volcano mount is among the most opted mount option for Starlink users. Its high tensile abilities and easy installation processes make it suitable for most homeowners across the globe. As with any other installation process, installing the Starlink volcano mount necessitates proper utilization of the provided materials and tools.
Starlink mount installation is the most straightforward procedure among internet satellite providers. With various mounting options such as the volcano mount, roof mount, and pole mount, finding one that is suitable for you can be a tricky and hard process.
For effective functioning, Starlink only needs a clear sky view to connect to the satellites in orbit. Starlink functionality can be achieved by anyone as StarLink involves simple DIY processes. Starlink is also in one kit, and the installation materials are all provided.
Understanding the right Starlink volcano mount techniques is imperative for proper functionality. Below is all you need to know about Starlink volcano mount.
Contents
Things to consider when choosing a Volcano Mount
If you’re looking for a volcano mount for your Starlink satellite dish, here are a few things to keep in mind.
- First, ensure the mount is compatible with your particular Starlink dish model.
- Second, consider where you’ll be placing the mount. You’ll want to ensure the Support is securely anchored if you reside in a high-wind area.
- Third, look at the different features offered by various manufacturers to find the mount that best suits your needs.
Installing Starlink Volcano Mount
This hassle always comes with installing a new setup into our home. But that’s not the case with Starlink. Installing Starlink internet all by yourself within minutes is now possible. So, how do you install Starlink after purchase? Starlink is a DIY-oriented installation and mounting company and thus comes with complete kits.
Since it is a DIY, you will need specific tools for effective installation. Some of these tools include:
- Volcano mount
- Carrying bag
- Sealing tape stripe
- Sealing tape squares
- 6 lag bolts
- Wall clips
Additional tools required for simple installation include:
- ½ inch socket wrench
- 5/32 inch drill bit
- Stud finder
- Drill
Instructions on how to properly install your volcano mount include:
- Find studs on a roof using a stud finder.
- Place the mount over the stud and mark six circles on the top.
- Drill holes into the six marked circles.
- Create oversized balls from the sealing tape squares and press them over
Each hole overlaps the edges. - Fix two sealing tape strips over the holes where the volcano mount will sit.
- Line the holes on the mount over the pre-drilled holes.
- tighten the bolts to be snug, plus 1/4 turn. Use a trench.
- Place all needed equipment into the carrying bag and carry them to the installation location. Do not set the Starlink directly onto the roof.
- Place the Starlink mast in the hole at the center of the mount.
- Take out your connected cable. Route one end into your home and connect it to the power supply.
- Using wall clips, fasten the cable along your router. Avoid perforating cable and sharp bends, and follow horizontal/vertical lines.
Setup / Configuration
1. Download the Starlink app on your phone.
2. Before installation, check for obstruction using the tool in the app. This helps identify the best location for uninterrupted service.
3. Set up your Starlink.
4. After connection, confirm the setup location is free from any obstruction-
Starlink Volcano Mount cost
SpaceX’s Starlink satellite constellation could one day provide low-cost internet to remote areas worldwide — but the company will need to build a lot of ground infrastructure to make that happen. One key piece of that infrastructure is the Starlink Volcano Mount, a large dish that will receive and transmit satellite signals.
The mount will be built in Hawaii, and SpaceX has already applied for a construction permit. The cost of the mount is not yet known, but it is likely to be significant. In addition to the cost of the mount itself, SpaceX will also need to build a facility to house the mount and support equipment, and there will be ongoing costs for operations and maintenance.
Safety Protocols During Installation
To minimize injury risk, electric shock, and fire, follow basic safety precautions, including:
- Ensure the power is disconnected before getting into, moving, or installing the Starlink. Starlink contains moving fragments when powered on.
- Plug the power cord into an AC outlet that is easily accessible. If the power cord has a 3-pin attachment, plug the cord into a grounded (earthed) 3-pin outlet.
- Only use the AC adapter and power cord provided with the system or purchased from S56821/SpaceX.
- Do not operate this product with a damaged power cord set. If the power cord is damaged, replace it before using this product.
- During operation, do not allow the AC adapter to contact skin or a soft surface, such as carpet/rug or clothing. The product and the AC adapter comply with the user-accessible surface temperature limits defined by applicable safety standards.
Do not operate the Starlink if you note some crackling, hissing, popping sounds, a strong odor, or smoke from the system. Turn off, disconnect the power source, and contact technical support.
To avoid injuries when drilling, take care and follow basic safety procedures such as:
- Wear the necessary eye, hand, and face gear.
- Avoid any electrical wiring paths and water lines. Drilling any of these can result to fire, shock or death.
- Drill at a slanted downward angle to the home exterior and apply the sealant. Wrong drilling and sealing may lead to water or bug intrusion or damage.
Online access problem?
- Power sequence the router by disconnecting the power supply for 30 seconds.
- Check that your mounting location is correct:
- Does Starlink have a clear sky view?
- Are you installing it at the order address?
- If these don’t work, contact customer support by logging into your account on the website starlink.com.
Change network ID/Password.
- If you already have a network ID/password, press the reset button of your router. If not, skip this step.
- When connected to the network, open a browser window on any device and follow the instructions.
- Wait ~2 minutes and rejoin the network with your personalized credentials.
Why order Starlink?
Residing in a remote area without landline internet options! Starlink offers high-speed broadband internet across most of the world with speeds of the big cities. Starlink provides custom Starlink mounting solutions specifically designed to handle harsh conditions and roof-style construction that are compatible with Starlink Dishy equipment.
FAQs
No, the mount is in the installation fee. If you do not know the perfect mounting choice for you, the technicians are ready to help.
The tripod that comes with the Starlink is intended for temporary or mobile installations; thus, it is advisable not to mount with it.
Installation varies depending on the complexity of the job and the mounting option chosen. The standard time for installation is roughly 3 hours.
Our Starlink install mount is exclusively available as part of our installation package. Our Starlink install mounts are intended for scenarios where the Starlink volcano or tripod mounts.
This depends on the job’s complexity and the number of stories, and the roofing material affects the installation cost.
Our Starlink install kits are based on the 6.5ft * 1.5in cranked poles. Low-profile brackets are available with either equipment or brackets with more standoff.
Conclusion
Thinking seriously about where to install your Starlink. Since Starlink obstructions are a problem, they translate into short outages without Internet access. Bulk downloads are still OK; they resume after the 15s outage. But many find that intolerable, particularly for anything interactive. Understanding the most suitable mount option is vital for optimal performance.
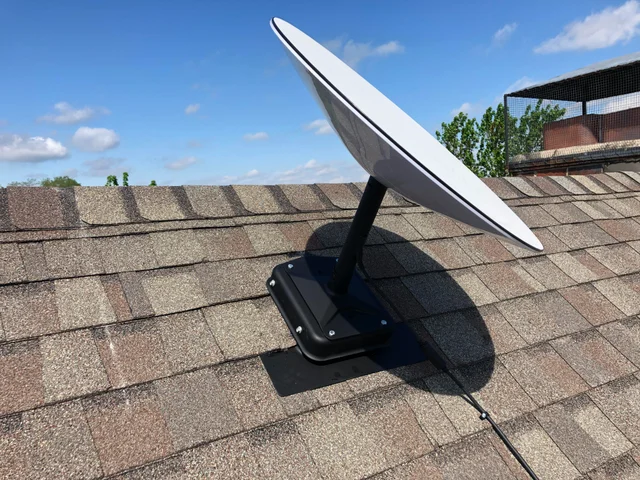
The volcano mount is ideal for most households as it requires an exposed area to the sky, which is not hard to achieve. Though faced with weather conditions, rest assured that they will not fail you.
SpaceX explicitly warns in its installation manual for the Volcano Mount that it is not designed for high winds or hurricane/tornado wind loads.” The company tells customers that tethering should be used in all cases to prevent failure in an unexpected wind event.”